
So you want to experiment with ASP.NET 5, but you don’t have a development and hosting environment available to work with, you can use Cloud9 IDE. From Wikipedia:
“Cloud9 IDE is a freeware online integrated development environment. It supports hundreds of programming languages, including PHP, Ruby, Python, JavaScript with Node.js, and Go. It enables developers to get started with coding immediately with pre-setup workspaces, collaborate with their peers with collaborative coding features, and web development features like live preview and browser compatibility testing.
It is written almost entirely in JavaScript, and uses Node.js on the back-end. The editor component uses Ace. As of July 2014, it uses Docker containers for its workspaces, and is hosted on Google Compute Engine.”
That is a lot of Non-Microsoft technology. So would it really be possible to run Microsoft web platform on that environment? It certainly is possible, because of Microsoft’s commitment on open source, web developers have an increasing number of options to work with. In this post, you will see how easy it is to get you started with ASP.NET MVC on Linux. At no cost and no local installation. All you need is a browser.
The first thing you need to have is an account on Cloud9. Browse to https://c9.io/ and create a new account. After logging in with your account, you see a page with workspaces. The page will be mostly empty. Then follow these steps:
-
Create a new Workspace.

-
Fill out the fields in the form, like so:
Workspace Name -> aspnet5 (or any name you like, but limited to lowercase and no spaces)
Description -> any description that makes it clear to you
- Choose the Custom template. Cloud9 currently has no readymade template for ASP.NET development. Once ASP.NET 5 is released that may change, although nothing is announced in this respect.
- Click on Create Workspace, and you are automatically transferred to the IDE.
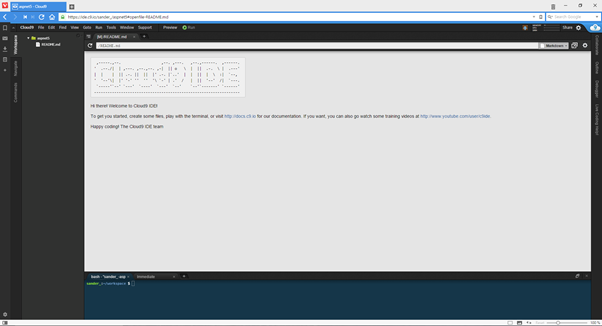
The workspace shows the folder tree on the left, the regular menu items like File, Edit and Find at the top. At the bottom, you see the bash shell where you can enter commands. You now have a working environment on Linux. You can use the commands uname -r and uname -a to get version information.
The instructions to install ASP.NET on Linux can be found here: http://docs.asp.net/en/latest/getting-started/installing-on-linux.html
Let’s follow the essentials steps necessary to get an ASP.NET MVC project up and running. That excludes some steps that are mentioned on the reference page above. E.g. the first suggested step is to install unzip and curl, but these tools are already installed.
-
Run the following command:
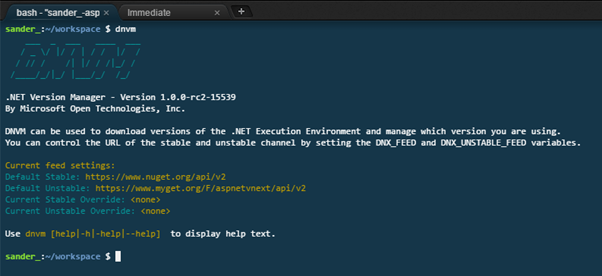
curl -sSL https://raw.githubusercontent.com/aspnet/Home/dev/dnvminstall.sh | DNX_BRANCH=dev sh && source ~/.dnx/dnvm/dnvm.sh

This downloads and installs DNVM, the .NET Version Manager. When it completes, you can use dnvm to get some information.
-
Next, we need to install the .NET Execution Environment or DNX. The prerequisites are installed with this command:
sudo apt-get install libunwind8 gettext libssl-dev libcurl3-dev zlib1g libicu-dev
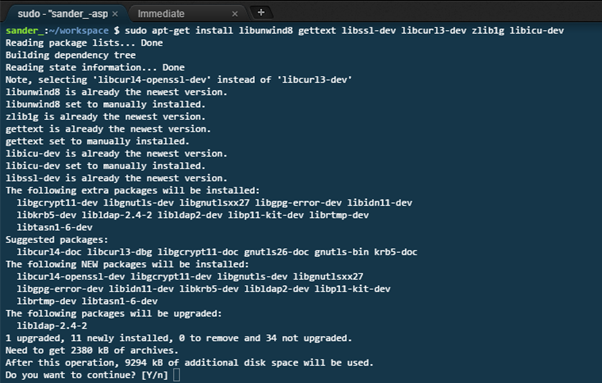
During installation, you need to confirm the operation. A lot of files are download and installed.

-
Now that the prerequisites are on the machine, we can install the latest version of the .NET Core CLR.
dnvm upgrade -r coreclr
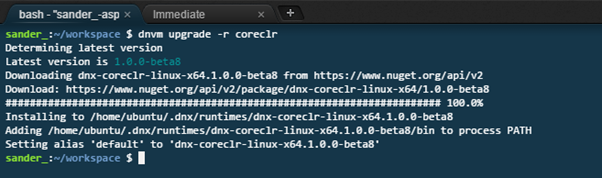
At the moment of writing this, the version of .NET Core is beta8. You can also use mono, which is more mature than .NET Core, but we skip this for now.
-
To run an ASP.NET website on Linux, you can use Kestrel, a cross platform HTTP server. For Kestrel to work, we need to install libuv first. Libuv is a multi-platform asynchronous IO library that is used by Kestrel. To build libuv you should run the following commands in sequence:
sudo apt-get install make automake libtool curl > not necessary
curl -sSL https://github.com/libuv/libuv/archive/v1.4.2.tar.gz | sudo tar zxfv – -C /usr/local/src
cd /usr/local/src/libuv-1.4.2
sudo sh autogen.sh
sudo ./configure
sudo make
sudo make install
sudo rm -rf /usr/local/src/libuv-1.4.2 && cd ~/
sudo ldconfig
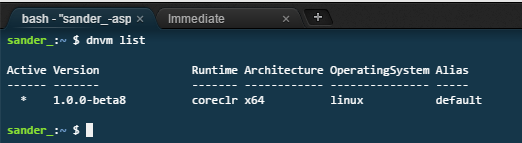
You should now have .NET working on Linux. You can check the version using dnvm list.
-
Now, let’s go back to our workspace folder, and create a folder for our ASP.NET project.
cd workspace/
mkdir wwwroot
Now that the working environment is setup, we can start with our ASP.NET MVC project. You can start with Visual Studio on a local machine and create a project based on a template. But since we want to use the browser only, we are going to create the necessary files “by hand”. To keep the instructions readable, when you need to add a folder, right-click on the parent folder and choose New Folder. The same applies to creating a new file and choose New File.
Here we go.
-
Create a new file with the following content
{
“sdk”: {
“version”: “1.0.0-beta8”
}
}
Save this file as global.json in the wwwroot folder.
-
Add another file, with the following content.
{
“version”: “1.0.0-beta8”,
“compilationOptions”: {
“emitEntryPoint”: true
},
“dependencies”: {
“Microsoft.AspNet.IISPlatformHandler”: “1.0.0-*”,
“Microsoft.AspNet.Server.Kestrel”: “1.0.0-*”,
“Microsoft.AspNet.Mvc”: “6.0.0-*”,
“Microsoft.AspNet.Mvc.TagHelpers”: “6.0.0-*”,
“Microsoft.AspNet.StaticFiles”: “1.0.0-*”,
“Microsoft.AspNet.Tooling.Razor”: “1.0.0-*”,
“Microsoft.Framework.Configuration.Json”: “1.0.0-*”,
“Microsoft.Framework.Logging”: “1.0.0-*”,
“Microsoft.Framework.Logging.Console”: “1.0.0-*”,
“Microsoft.Framework.Runtime.Abstractions”: “1.0.0-*”,
“Microsoft.AspNet.Diagnostics”: “1.0.0-*”
},
“commands”: {
“kestrel”: “Microsoft.AspNet.Hosting –server Microsoft.AspNet.Server.Kestrel –config hosting.json”
},
“frameworks”: {
“dnxcore50”: { }
}
}
Save this file as project.json.
-
Note that the project file contains the option “emitEntryPoint”: true. However, the build that is available at time of writing this post does not seem to support this. So we will need to add a static void Main method in our Startup.cs. Add the following content to a new file, named Startup.cs.
using System;
using System.Collections.Generic;
using System.Linq;
using System.Threading.Tasks;
using Microsoft.AspNet.Builder;
using Microsoft.AspNet.Diagnostics;
using Microsoft.AspNet.Hosting;
using Microsoft.AspNet.Http;
using Microsoft.AspNet.Routing;
using Microsoft.Framework.Configuration;
using Microsoft.Framework.DependencyInjection;
using Microsoft.Framework.Logging;
using Microsoft.Framework.Logging.Console;
using Microsoft.Dnx.Runtime;
namespace WebApplication1
{
public class Startup
{
public Startup(IHostingEnvironment env, IApplicationEnvironment appEnv)
{
// Setup configuration sources.
var builder = new ConfigurationBuilder()
.AddJsonFile(“config.json”)
.AddEnvironmentVariables();
Configuration = builder.Build();
}
public IConfiguration Configuration { get; set; }
// This method gets called by the runtime.
public void ConfigureServices(IServiceCollection services)
{
// Add MVC services to the services container.
services.AddMvc();
}
// Configure is called after ConfigureServices is called.
public void Configure(IApplicationBuilder app, IHostingEnvironment env, ILoggerFactory loggerFactory)
{
loggerFactory.MinimumLevel = LogLevel.Information;
loggerFactory.AddConsole();
// Add static files to the request pipeline.
app.UseStaticFiles();
// Add MVC to the request pipeline.
app.UseMvc(routes =>
{
routes.MapRoute(
name: “default”,
template: “{controller=Home}/{action=Index}/{id?}”);
// Uncomment the following line to add a route for porting Web API 2 controllers.
// routes.MapWebApiRoute(“DefaultApi”, “api/{controller}/{id?}”);
});
}
public static void Main(string[] args)
{
}
}
}
-
Add the following new folders:
Controllers/Home
Controllers/Views
- In Controllers/Home, add a new file named HomeController.cs with the following content.
using System;
using System.Collections.Generic;
using System.Linq;
using System.Threading.Tasks;
using Microsoft.AspNet.Mvc;
namespace WebApplication1
{
public class HomeController : Controller
{
public IActionResult Index()
{
ViewBag.System = Environment.GetEnvironmentVariable(“_system_name”);
ViewBag.Version = Environment.GetEnvironmentVariable(“_system_version”);
return View();
}
}
}
-
In Views/Home, add a new file named Index.cstml with the following content.
<html>
<body>
<p>ASP.NET is now working on:</p>
<p>System: @ViewBag.System</p>
<p>Version: @ViewBag.Version</p>
</body>
</html>
We are almost ready. The project file (project.json) contains all dependencies for ASP.NET MVC. But these dependencies are not automatically available, we need to download these using the following command.
dnu restore
This command will download all packages.
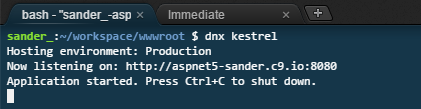
You can now start the project using the following command.
dnx kestrel
However, when you do this, you get the following output.
Hosting environment: Production
Now listening on: http://localhost:5000
Application started. Press Ctrl+C to shut down.
This is a bit awkward because if we open this address in the browser, it will try to connect to your machine, where the site is not running. To fix this, you can either use nginx to act as a proxy. Instructions on this can be found here: http://druss.co/2015/06/asp-net-5-kestrel-nginx-web-server-on-linux/
Alternatively, you can add a hosting.json file (formerly hosting.ini) to set configuration parameters for Kestrel. In fact, we already added a reference to this file in project.json.
This hosting.json contains the following.
{
“server”:”Microsoft.AspNet.Server.Kestrel”,
“server.urls”:”http://aspnet5-sander.c9.io:8080″
}
Note that the server url contains an address. You should enter the address that is used in your workspace. The address is a combination of your username and workspace name, divided by a dash.
The port number is 8080 because by default, you cannot open up a port below 1024 on a Linux machine.
To restart the web server, press CTRL+C and run the following command.
dnx kestrel
Now you should see something like this.
Now you can open up a new browser window and navigate to
Note that you do not need to use port 8080. Both 8080 and port 80 work and life is good.
Notes
Please note that this post uses commands an instructions that are not finalized yet. Check out https://docs.asp.net/en/latest/ for the latest information and changes.